Ready to bring your Maytag 5000 Series dryer back to life? Don’t wait any longer – dive into our foolproof belt replacement guide today! DIY your way to a fully functioning dryer now!
- Chapter 1: Diagnosing the Problem
- Chapter 2: Gathering the Tools and Parts
- Chapter 3: Safety Precautions
- Chapter 4: Accessing the Dryer Belt
- Chapter 5: Removing the Old Belt
- Chapter 6: Installing the New Belt
- Chapter 7: Reassembling the Dryer
- Chapter 8: Testing and Troubleshooting
- Conclusion
- Best Sellers in Dryer Parts:
- Other Dryer Troubleshooting Guides:
Welcome to our comprehensive guide on Maytag 5000 Series dryer belt replacement. If you’re experiencing issues with your Maytag 5000 Series dryer and suspect that a worn-out or broken belt is the culprit, you’re in the right place. In this article, we’ll walk you through the step-by-step process of replacing the belt dryer parts, ensuring your appliance runs smoothly once again.
Chapter 1: Diagnosing the Problem
Before you dive into the Maytag 5000 Series dryer belt replacement process, it’s essential to determine whether the dryer belt is indeed the culprit behind your appliance’s issues. Identifying the problem correctly will save you time and ensure a successful repair.
Common Signs of a Faulty Dryer Belt:
- Unusual Noises: If you hear strange, high-pitched squealing or thumping sounds when the dryer is running, it may be due to a worn-out or damaged belt.
- Drum Not Spinning: If the drum inside your dryer isn’t spinning, it’s a clear indication that the belt is malfunctioning. A functioning belt is responsible for turning the drum and allowing your clothes to tumble.
- Visible Wear and Tear: Inspect the belt visually. If you notice any fraying, cracks, or significant wear, it’s time for a replacement.
- Burning Smell: A malfunctioning belt can cause the dryer to overheat, resulting in a burning smell. If you detect this odor, turn off the dryer immediately and investigate the issue.
By recognizing these signs, you can be reasonably confident that a dryer belt replacement is necessary.
Chapter 2: Gathering the Tools and Parts
To successfully replace the Maytag 5000 Series dryer belt, you’ll need the right tools and the replacement part. Here’s what you’ll need:

Tools:
- Screwdriver (usually Phillips or Torx, depending on your dryer model)
- Nut driver or socket wrench
- Putty knife or paint scraper
- Work gloves and safety goggles
- Multi-meter (for electrical safety checks)
- Replacement Maytag 5000 Series dryer belt
Where to Find Replacement Parts:
You can purchase the Maytag 5000 Series dryer belt from authorized appliance parts dealers, home improvement stores, or online retailers. Ensure that you have the correct part number and model information to get the right belt for your specific dryer.
Chapter 3: Safety Precautions
Safety should be your top priority when working with any home appliance. Follow these safety precautions to ensure a risk-free dryer belt replacement process:
- Unplug the Dryer: Always disconnect the dryer from the power source to prevent electrical accidents.
- Wear Protective Gear: Put on work gloves to protect your hands from sharp edges and safety goggles to shield your eyes from debris.
- Work in a Well-Ventilated Area: Adequate ventilation prevents the buildup of potentially harmful fumes.
- Secure the Dryer: Ensure the dryer is on a stable surface and won’t tip over during disassembly.
- Read the User Manual: Consult your dryer’s user manual for specific safety guidelines and manufacturer recommendations.
By adhering to these safety measures, you can perform the Maytag 5000 Series dryer belt replacement confidently and securely.
Chapter 4: Accessing the Dryer Belt
Before you can replace the dryer belt, you need to access the interior of your Maytag 5000 Series dryer. Here’s how to do it safely:
Step 1: Unplug the Dryer: Ensure the dryer is disconnected from the power source to prevent electrical accidents.
Step 2: Locate and Remove the Screws: Most dryers have screws securing the top panel and front panel. Use a screwdriver or nut driver to remove these screws. Typically, you’ll find them along the top edge of the front panel.
Step 3: Remove the Top Panel: Once the screws are out, lift the top panel of the dryer and set it aside. Some models have clips instead of screws, so check your user manual for guidance.
Step 4: Remove the Front Panel: After removing the top panel, locate and remove the screws or clips securing the front panel to the dryer cabinet. Carefully tilt the front panel away from the cabinet and disconnect any wiring harnesses or door switch wires, if necessary.
Step 5: Access the Dryer Belt: With the front panel removed, you’ll have clear access to the dryer’s drum, motor, and belt. Now you’re ready to move on to removing the old belt.
By following these steps, you can safely access the interior of your Maytag 5000 Series dryer for the belt replacement process.
Chapter 5: Removing the Old Belt
Now that you have access to the dryer’s interior, it’s time to remove the old, worn-out belt. Follow these steps carefully to ensure a smooth replacement process:
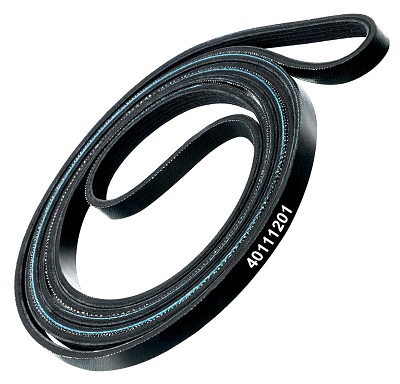
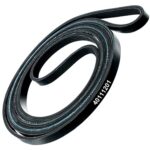
Step 1: Locate the Dryer Belt: The dryer belt is a loop of rubber or fabric that wraps around the dryer’s drum, motor pulley, and idler pulley. Identify the belt’s path before proceeding.
Step 2: Release Tension on the Belt: To remove the old belt, you need to release tension from the idler pulley. Use a nut driver or socket wrench to release the tension and carefully slide the belt off the motor pulley and idler pulley.
Step 3: Remove the Belt: With the tension released, slide the old belt off the drum and remove it from the dryer.
Step 4: Inspect the Belt: Take a moment to inspect the old belt for any signs of damage, such as fraying or cracks. If it’s in poor condition, discard it.
Maytag Dryer Belt Replacement Guide | DIY Repair Tutorial
Learn how to replace a broken belt on your Maytag Dryer with this comprehensive DIY tutorial by Bill Newberry. Get your dryer tumbling again with step-by-step instructions in this easy-to-follow video guide.
Chapter 6: Installing the New Belt
Now that you’ve successfully removed the old belt, it’s time to install the Maytag 5000 Series dryer belt replacement. Follow these steps to ensure proper installation:
Step 1: Position the New Belt: Take the new dryer belt and position it around the dryer’s drum, ensuring it follows the same path as the old belt.
Step 2: Engage the Idler Pulley: To create tension on the belt, you’ll need to engage the idler pulley. Use a nut driver or socket wrench to apply tension on the idler pulley, allowing you to slide the new belt over the motor pulley.
Step 3: Confirm Proper Alignment: Double-check that the new belt is aligned correctly on the drum, motor pulley, and idler pulley. Ensure there are no twists or kinks in the belt.
Chapter 7: Reassembling the Dryer
With the new dryer belt in place, it’s time to reassemble your Maytag 5000 Series dryer. Follow these steps to put all the components back together:
Step 1: Reattach the Front Panel: Carefully lift the front panel back into position, aligning it with the slots or clips on the dryer cabinet. Secure it in place by reinstalling the screws or clips you removed earlier.
Step 2: Reconnect Wiring Harnesses: If you disconnected any wiring harnesses or door switch wires, now is the time to reconnect them.
Step 3: Reinstall the Top Panel: Lower the top panel back into place and secure it with the screws or clips.
Step 4: Plug in the Dryer: Reconnect the dryer to the power source by plugging it back in.
Chapter 8: Testing and Troubleshooting
Now that you’ve completed the Maytag 5000 Series dryer belt replacement and reassembled the dryer, it’s time to test it to ensure it’s working correctly.
Testing the Dryer:
- Close the dryer door securely.
- Set the dryer to a test cycle, such as a “no heat” or “air fluff” cycle.
- Turn the dryer on and listen for any unusual noises.
- Verify that the drum is spinning smoothly.
Troubleshooting:
If you encounter any issues during the testing phase, refer to your user manual for troubleshooting tips. Common problems might include:
- Drum not spinning: Double-check the belt’s alignment on the motor pulley and idler pulley.
- Unusual noises: Investigate any new sounds and ensure all components are properly reassembled.
By following these testing and troubleshooting steps, you can address any potential issues and ensure your Maytag 5000 Series dryer is operating as it should.
Conclusion
Congratulations! You’ve successfully replaced the Maytag 5000 Series dryer belt, saving time and money on costly repairs. With proper maintenance and care, your dryer should continue to run efficiently for years to come. If you have any further questions or encounter issues, consult your user manual or consider seeking professional assistance for more complex problems.
Best Sellers in Dryer Parts:
- W10208415 Whirlpool Washer Dryer Door Hinge
 Part Name: Washer Dryer Door HingePart Number: W10208415Replacement Parts: W10208415, 1872427, AP6017115, PS11750410, EAP11750410Compatible Brands: Maytag, Whirlpool, Crosley, … Read more
 - DC97-16782A Samsung Dryer Drum Roller
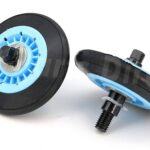 Part Name: Clothes Dryer Drum Roller Assembly PartPart Number: DC97-16782AReplacement Parts: DC97-07523A, DC97-07523B, 2027851, AP5325135, PS4221885, EAP4221885Compatible Brands: … Read more
 - DC97-14486A Samsung Dryer Heating Element Assembly
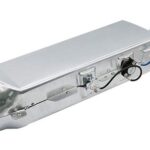 Part Name: Dryer Heating ElementPart Number: DC97-14486AReplacement Parts: DC97-08891A, DC97-14486D, DC9714486A, 1795935, AP4342351, PS2432265, EAP2432265Compatible Brands: Kenmore, Amana, … Read more
 - Samsung Dryer Replacement Parts
 Are you in search of Samsung Dryer Replacement Parts to fix your appliance quickly and … Read more
 - Whirlpool Dryer Thermostat 3977767
 Part Name: Dryer high limit thermostat, Dryer Thermal Fuse & Thermostat KitPart Number: WP3977767Replacement Parts: 3399693, 3977767, … Read more
Other Dryer Troubleshooting Guides:
- Troubleshooting No Heat from the Dryer Issues
 Experiencing the frustration of “No Heat from the Dryer“? Our comprehensive Dryer Not Heating Troubleshooting … Read more
 - Troubleshooting Whirlpool Electric Dryer Won’t Start
 Introducing our comprehensive video guide on troubleshooting the common issue of a Whirlpool dryer that … Read more
 - Clothes Dryer Woes: Troubleshoot Like a Pro with Q&A!
 Welcome to our comprehensive Dryer Troubleshooting Guides! A malfunctioning dryer can throw a wrench into … Read more
 - Maytag 5000 Series Dryer Belt Replacement Guide
 Ready to bring your Maytag 5000 Series dryer back to life? Don’t wait any longer … Read more
 - Samsung Dryer Troubleshooting Guide
 Discover the solutions to your Samsung dryer problems and get your laundry routine back on … Read more